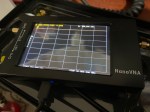
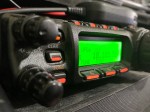
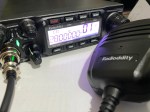
One day I was checking the bands and noticed the 17m band is open for a short period. I have noticed this over a long period that it often opens and provides reliable DX contacts at a similar time each day. I often could clearly hear operators who were midway through conversation, then suddenly the band would open, and their conversation became a bit more public than it started.
The 20 m Band (14 MHz) is the HF workhorse band for DX, long-distance communication, ragchewing, nets, and contests. It offers the most reliable daytime propagation, often remains open into the evening, and can support worldwide contacts even during moderate solar activity. Because of its popularity, the band is frequently crowded with higher levels of QRM (interference) and contest activity.

The 17 m Band (18 MHz) is a WARC band, meaning major contests are generally not permitted, resulting in a much quieter operating environment. It provides excellent DX propagation during daylight hours, especially when solar conditions are good. The band often has lower noise, less congestion, and more available frequencies for casual operation.
The key comparison between the bands are, 20 m offers the most consistent worldwide HF propagation and longest daily operating window, while 17 m offers a quieter, less crowded experience with excellent DX opportunities.
If you enjoyed this read, here are some more you may enjoy:
- 20m vs 17m
 One day I was checking the bands and noticed the 17m band is open for a short period. I have noticed this over a long period that it often opens and provides reliable DX contacts at a similar time each day. I often could clearly hear operators who were midway through conversation, then suddenly the…
 - HF on a Hand Held?
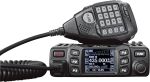
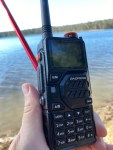
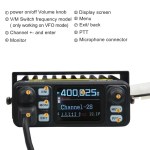
 Radioditty sent the new GS-10B Pro to me before it was released as they wanted you to see it first. When sending it, they never told me what to say, only to review it. So below is what I honestly experienced. This handheld radio is not only dualband UHF, VHF radio, it also receives HF,…
 - CW Skimmer
 CW Skimmer is a popular amateur radio software program used for decoding Morse code signals on the HF bands. The program is widely used by ham radio operators, DX chasers, and contest stations because it can monitor and decode many CW signals at the same time. Unlike traditional Morse code listening, CW Skimmer displays signals…
 - 15 Metre band
 The 15 metre band is one of the most popular HF amateur radio bands for long-distance communication, offering an excellent balance between reliability and worldwide reach. Frequency Range The standard frequency range for the 15m band is 21.000 MHz to 21.450 MHz. Within this range, different segments are commonly used for specific modes: CW (Morse…
 - Maximum Usable Frequency (MUF) in HF Radio Propagation
 Maximum Usable Frequency (MUF) is an important concept in HF radio propagation and amateur radio communications. It refers to the highest frequency that can be used for reliable communication between two locations by reflecting off the ionosphere. If a radio signal is transmitted above the MUF, it will not return to Earth and will instead…
 - Lightning Storm & HF Radio
 HF radio and lightning storms are closely connected because lightning creates strong radio frequency interference that affects HF radio communication (3–30 MHz). High Frequency radio is commonly used for amateur radio (ham radio), marine radio, aviation HF communication, emergency communications, and long-distance shortwave listening. HF signals travel long distances by reflecting off the ionosphere, which…
 - OpenHamClock
 OpenHamClock is an open-source amateur radio dashboard designed as a modern successor to the original HamClock used by radio amateurs worldwide. It provides a real-time visual display of essential ham radio propagation data, world clocks, DX activity, and space weather information in a single, easy-to-read interface. Built with modern web technology, OpenHamClock runs in any…
 - What is an Antenna Coupler
 An antenna coupler (also called an antenna tuner or matching network) is a device used in radio systems to ensure impedance matching between a transmitter and an antenna. Most transmitters are designed for a specific impedance, commonly 50 ohms, while antennas often vary depending on frequency and design. When the impedance is not matched, reflected…
 - Antennas
 Amateur radio operators use many different antenna types, each designed for specific bands, space limits, and operating goals. Here’s a clear overview of the most common ones and why hams choose them. Wire Antennas These are some of the simplest and most popular antennas that include: Dipole Antennas End-fed wire Inverted-V Vertical antennas Vertical antennas…
 - Dipole Antenna for Portable Use – Make your own!
 A dipole antenna is a basic radio antenna made of two conductive elements fed at the center. It is typically a half-wavelength long and is widely used as a reference antenna in antenna theory and practice. Dipole antennas work by converting alternating current into electromagnetic waves. Their radiation pattern is strongest perpendicular to the antenna…