A simple tip that you may always use after reading this.
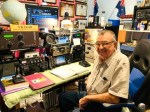
Often our shacks end up with cables everywhere. It can be a little hard to remember what cable goes where after a few years. It all starts well but as the equipment grows, so do the cables. I have trouble with the power cords in the power boards and what each plug is!
My shack originally only had one cable that went out that hole, “I’ll remember what it is” we all say years later. But sometimes we might upgrade an antenna or radio. In doing so, it is far easier to use the same cable if it is ok, especially if it goes down a wall or through a small hole. After a few changes, the whole thing can become a bit of a mess (not that anyone else needs to know).
Power cables are easier to manage, as I stick a sticker on each plug at the power board to remind me what they go to. So, if I need to change the power board, I know exactly which plug I am pulling out.
But antenna cables are a bit harder. I started writing on a post it notes what this cable was for and taped it to the cable near the plug, but if you swap it to something else, you must change the note. Maybe you forgot last time you changed something or ran out of time. Perhaps after the testing you got so excited about the positive test you never did update the note on your cable.
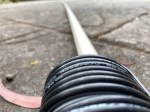
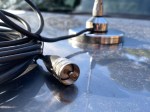
So, I now have a new system. I colour code each cable at each end with electrical tape as shown below in the photo.
Using the same colour code on each end, I can now be sure which cable goes to which end. One of my cables has two of the same colour, which is fine, whatever works for you.
If you do this just before the plug at each end, then you can see which antenna the cable goes into and which radio. You could also do it again at the bottom of the tower or window so you know halfway along the cable.
I then have a list of yellow 1 strip = HF 6m and Red = VHF/UHF etc. if I swap the antennas, I just must change the list. I can double check by going outside to see what the same colour code ends up. The electrical tape will stay the same and will last a lot longer than handwritten notes.
So, what do you do to keep your station in order? Do you just remember? Do you have a system? Why not share it in the comments below so we can all learn from you.
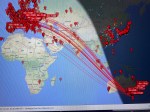
Amateur Radio Television (ATV), often called “ham TV,” is a niche part of amateur television where licensed radio operators transmit live video and audio over radio frequencies instead of traditional broadcast networks. It is essentially an extension of amateur (ham)…
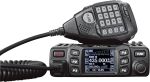
The Baofeng UV-5R Mini handheld radio is a popular and affordable dual-band amateur radio transceiver widely used by beginners and experienced ham radio operators. Designed as a compact version of the original UV-5R, this small and lightweight VHF/UHF walkie talkie…
HF radio and lightning storms are closely connected because lightning creates strong radio frequency interference that affects HF radio communication (3–30 MHz). High Frequency radio is commonly used for amateur radio (ham radio), marine radio, aviation HF communication, emergency communications,…
OpenHamClock is an open-source amateur radio dashboard designed as a modern successor to the original HamClock used by radio amateurs worldwide. It provides a real-time visual display of essential ham radio propagation data, world clocks, DX activity, and space weather…
An antenna coupler (also called an antenna tuner or matching network) is a device used in radio systems to ensure impedance matching between a transmitter and an antenna. Most transmitters are designed for a specific impedance, commonly 50 ohms, while…
Amateur radio operators use many different antenna types, each designed for specific bands, space limits, and operating goals. Here’s a clear overview of the most common ones and why hams choose them. Wire Antennas These are some of the simplest…
A dipole antenna is a basic radio antenna made of two conductive elements fed at the center. It is typically a half-wavelength long and is widely used as a reference antenna in antenna theory and practice. Dipole antennas work by…
Interference in Amateur Radio refers to unwanted signals that disrupt radio communication. This interference can reduce signal clarity, make contacts difficult, or completely block communication between amateur radio operators. Radio Frequency Interference (RFI) is one of the most common problems…
Prior to 1989, it was illegal to operate between 50 MHz and 52 MHz in Australia. It was a real pain as that was where all the action was when the band opened up. However, after many requests from the…
I’ve heard a lot about dipole antennas, and I’ve heard a lot about long wire antennas also. I would say I’ve seen more dipoles than long wire antennas. So why is that? What is the difference between them? Which is…
I bought this wireless keyboard/mouse which was very cheap. It does come with a USB dongle. It has a fantastic range since it is 2.4GHz RF. The back also has good grip which apparently isn’t common on all models. You can select what colour you want the plastic to be also.
Setup
Setup couldn’t be easier. Make sure it has batteries installed, some come with a rechargeable, mine required triple A batteries. Make sure the switch on the top side of the keyboard it to the left position for it to turn on – it should light up when you do this. Then in the battery compartment will be the USB dongle. Just plug in the USB dongle before powering up (if it is into an Android box), then it will connect and work fine straight away. If your model came with the battery, there may be a cord to charge the unit also.
Touch Pad
The top part of the keyboard in the touch pad area controls your mouse position. Using two fingers will scroll up and down the scroll bars. Unfortunately two finger zooming does not work. Right click can be done by a simultaneous two finger tap. You can turn the touch pad on or off by pressing Fn + F8.
Changing the Touch Pad Tracking Speed
All you have to do is press the blue Fn (function) button down the bottom left corner, then press the space bar.
Shortcuts
The keyboard comes with the following shortcuts at the top of the keyboard.
Far left Shortcuts
Over the far left side are media buttons, including volume up and down, pause and play, next track
Middle shortcuts
Either side of the touch pad are shortcuts, then are the following from top to bottom in order
Left Side of Touch Pad
Right Side of Touch Pad
1. Open Music Player App
1. Open Google Search
2. Open Email App
2. Go home button
3. Mute button
3. Internet Browser
4. Mouse left button ( this is also on the far left of the letters below on the top)
4. Mouse right button (this is also on the far left of the letters below on the bottom)
Far right Shortcuts
Over the right side at the top are directional buttons with an OK button in the middle.
Sleep Mode
The Keyboard will auto sleep and wake-up to save the battery. When the keyboard is idle for 3 minutes, it will go into auto sleep mode, and all LED indicators will turn off.
Keyboard Glowing Colours
Some keyboards glow at night. Unfortunately mine foes not, but if yours does, you just press blue the Fn key down the bottom left and the F2 key to change the colours. Press Fn-F2 again to change to the next colour and so on. This will give you the three standard colours. However, if your feeling nerdy, you can press and hold down the Fn key, then using your thumb on the touch pad, move it left and right to get all the other colours. There are 7 different colours in total.
If you want to be a geek of all the nerds, you can do the RGB spectrum, but pressing and holding F2 and then scrolling your thumb across left to right on the touch pad, then let go. It will scroll through all the colours automatically. You can still use the touch pad as normal while it automatically changes colours. I guess not having this saves some power also, however it does turn off every 30 or so seconds. There is a switch up the top right on the side of the keyboard that will turn it off also.
Fuction Keys
Apart from what I have already mentioned, you can do the following functions using the blue function key (Fn) found down the bottom left corner.
Fn + Fn = Enter into pair mode
Fn + F7 = take a screen shot
Fn + F8 = turn on or off the touch pad
Fn + F9 = F11 key
Fn + F10 = F12 key
Fn + Back = Delete
Fn + Page Up = Home
Other Keyboards
Here is a review on several other keyboards of similar size. This is not my video, but thought it gave a good quick overview of several models available.
Conclusion
The size of the keyboard is just right, not to small so you can’t find it or use it easily, but not to big so it takes over the desk or armchair. It works well with my Android TV device, but understand it does work on other devices such as windows, Raspberry Pi etc.
If I was going to buy it again, I may get the one with the inbuilt battery installed that can be re-charged, however once the batter goes, you almost have to replace it. My model could be loaded up with rechargeable batteries you can buy from anywhere.
Before I was using this Keyboard, I used a USB mouse, and while in some ways that is easier than a touch pad, to have a full keyboard and the touch pad all cordless with a good range is fantastic.
Other things to read
Enjoyed the read, why not subscribe to this site. Here are some other interesting reads:
An unusual name, but a catchy name no less, just like Peanut that was written by the same person, David PA7LIM. If you like Peanut, then you will like this project also. This project, like Peanut, includes some amazing coding and thinking.…
I found it hard to find useful information on how to run the OpenGD-77 hotpot mode with Windows 10. At the time of writing this, there is a lot about this topic using a pistar and even android or ISO, but not much with Windows 10. This is my experence with BlueDV and Open GD-77 using a Windows 10 PC.…
This page is just a help to friends I have spoke to who are interested in upgrading the Radioditty GD-77 to the OpenGD77 software. This is not my work, however I really do appreciate Roger and his team have done to put this together. I claim no responsibility if it breaks your radio, however I have not hear this happen now in some time. I am not an expert at all with OpenGD77, I have just put this together to help people who have asked me how to do it.…
A good friend of mine, Mike VK5ZC, put the information below together and asked me to put it on my web site. He has spent a lot of time putting it together with pictures and videos, so I encourage you to have a good read.…
A good friend of mine, Mike VK5ZC, put the information below together and asked me to put it on my web site. He has spent a lot of time putting it together with pictures and videos, so I encourage you to have a good read.…
I recently started using ProScan after years of using FreeScan. I have always enjoyed using FreeScan as it is easy to setup, I can download outputs from the software, and the main reason “it works”. However ProScan seems to be more graphical and has different features also.…
I recently started using ProScan after years of using FreeScan. I have always enjoyed using FreeScan as it is easy to setup, I can download outputs from the software, and the main reason “it works”. However ProScan seems to be more graphical and has different features also.…
I bought this wireless keyboard/mouse which was very cheap. It does not come with batteries, but come with a USB dongle. It has a fantastic range since it is 2.4GHz RF. The back also has good grip which apparently isn’t common on all models. You can select what colour you want the plastic to be also.…


 Amateur Radio Television (ATV), often called “ham TV,” is a niche part of amateur television where licensed radio operators transmit live video and audio over radio frequencies instead of traditional broadcast networks. It is essentially an extension of amateur (ham)…
 The Baofeng UV-5R Mini handheld radio is a popular and affordable dual-band amateur radio transceiver widely used by beginners and experienced ham radio operators. Designed as a compact version of the original UV-5R, this small and lightweight VHF/UHF walkie talkie…
 HF radio and lightning storms are closely connected because lightning creates strong radio frequency interference that affects HF radio communication (3–30 MHz). High Frequency radio is commonly used for amateur radio (ham radio), marine radio, aviation HF communication, emergency communications,…
 OpenHamClock is an open-source amateur radio dashboard designed as a modern successor to the original HamClock used by radio amateurs worldwide. It provides a real-time visual display of essential ham radio propagation data, world clocks, DX activity, and space weather…
 An antenna coupler (also called an antenna tuner or matching network) is a device used in radio systems to ensure impedance matching between a transmitter and an antenna. Most transmitters are designed for a specific impedance, commonly 50 ohms, while…
 Amateur radio operators use many different antenna types, each designed for specific bands, space limits, and operating goals. Here’s a clear overview of the most common ones and why hams choose them. Wire Antennas These are some of the simplest…
 A dipole antenna is a basic radio antenna made of two conductive elements fed at the center. It is typically a half-wavelength long and is widely used as a reference antenna in antenna theory and practice. Dipole antennas work by…
 Interference in Amateur Radio refers to unwanted signals that disrupt radio communication. This interference can reduce signal clarity, make contacts difficult, or completely block communication between amateur radio operators. Radio Frequency Interference (RFI) is one of the most common problems…
 Prior to 1989, it was illegal to operate between 50 MHz and 52 MHz in Australia. It was a real pain as that was where all the action was when the band opened up. However, after many requests from the…
 I’ve heard a lot about dipole antennas, and I’ve heard a lot about long wire antennas also. I would say I’ve seen more dipoles than long wire antennas. So why is that? What is the difference between them? Which is…