Amateur Radio Television (ATV), often called “ham TV,” is a niche part of amateur television where licensed radio operators transmit live video and audio over radio frequencies instead of traditional broadcast networks. It is essentially an extension of amateur (ham) radio, using higher bandwidth signals to carry moving images, typically on UHF and microwave bands. Unlike commercial TV, ATV is non-commercial and used for experimentation, hobby activity, and technical learning.

In Melbourne Australia, amateur radio TV activity is centred around the well-known VK3RTV system. This is a digital amateur television repeater that broadcasts across much of the metropolitan area, allowing operators to transmit and receive video signals. It operates continuously and uses modern digital TV standards (DVB-T2 HD), transmitting on 445.5 MHz. The system supports multiple input formats (such as DVB-S/S2 and DVB-T) and provides wide coverage across Melbourne and even towards Geelong.
Melbourne’s ATV community has a long history, with amateur television transmissions dating back to the late 1970s. Originally analogue, the system transitioned to digital broadcasting in the 2000s and was re-established in 2020 after a temporary shutdown. Today it is considered technically advanced, featuring multiplexed digital channels, HD video, and even internet-linked streaming to international amateur TV networks.
Activity in Melbourne ATV is typically community-driven. Enthusiasts participate in scheduled “net nights” (weekly on-air meetups), experimental broadcasts, and live video contacts between stations. Operators may transmit a wide range of content including technical demonstrations, hobby projects, model aircraft footage, or informal chats. Voice coordination is often done on separate 2meter FM frequency, 147.400 MHz, while video is transmitted through the ATV repeater.
Amateur TV is also known as High-Scan TV. A related but distinct mode is Slow-Scan Television, which is also used by amateur radio operators in Australia. Instead of live video, SSTV sends still images over radio, taking several seconds to minutes per picture. This mode is popular for long-distance (HF) communication and even space-related transmissions, complementing the faster “full-motion” ATV systems used locally in Melbourne.
Overall, amateur Radio TV in Melbourne is a small but technically rich hobby combining radio engineering, digital broadcasting, and experimentation. It operates outside mainstream media, relying on licensed operators, shared infrastructure like VK3RTV, and a collaborative community that keeps the technology evolving.
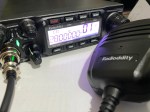
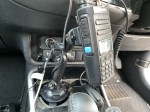
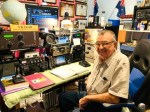
This view shows how I got involved, and found out how to reveive it with the help of people in this video. Although I only show one set top box, I actually have two, plus two screens, so I can receive channel 1 and 2 at the same time. These two channels are independent of each other in some ways, but transmit from the same site.
I really hope you enjoy this video, and it encourages you to this part of the hobby. Please put what comments or questions you have below as I will try to answer them. I am not an expert in this area at all, but still learning and hope to one day transmit onto VK3RTV. If you live away from Melbourne, you can still access it via Discord (see link on video) or via Youtube as shown in the video.
Thank you again to Peter, Steven and Clint for your your endless help.
Some good links are available here:
http://www.vk3rtv.com/
https://amateurradio.com.au/repeaters/vk3rtv
https://www.emdrc.com.au/datv-repeater-vk3rtv/
Have a look at my video for more info
Other Reads
If you enjoyed this article, here are some more you may be interested in:
- Zastone D9000 Number Lock
 I purchased this radio from a friend, and it worked well. He hadn’t really used it, so I did a factory reset. This was a bit of a mistake, as it did a few things like turning everything to Chinese. I had to use my phone…
 - Yaesu FT-620
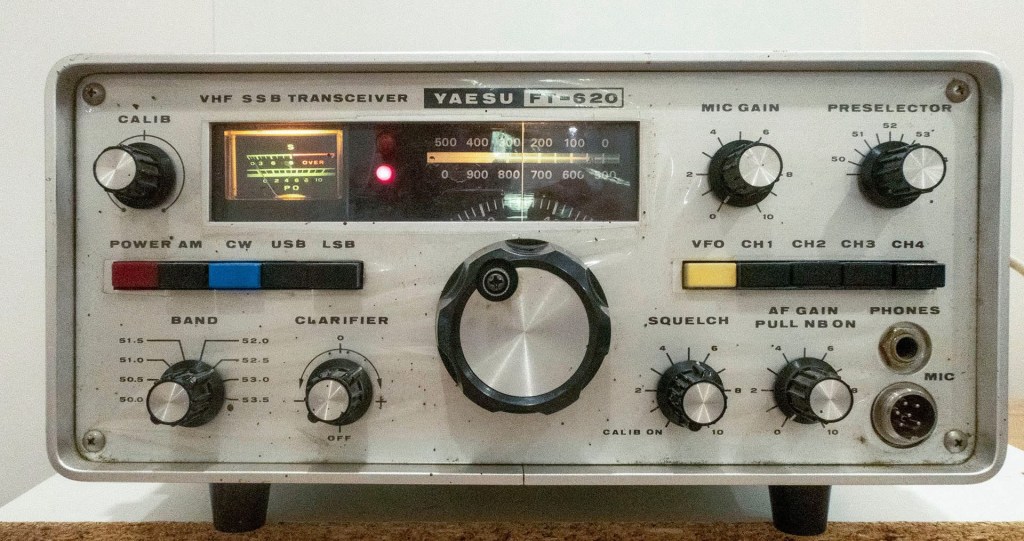
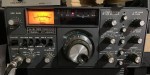
 The Yaesu FT-620 (and its updated version, the FT-620B) is a vintage amateur radio transceiver designed specifically for the 6-meter band (50–54 MHz). Produced in the 1970s, it offers support for AM, CW, and SSB (USB/LSB) modes, making it a versatile rig for its time, especially during the era when 6 meters was…
 - Yaesu FT-225R
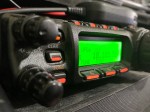
 The 2m band has always been an interesting one for me. It used to be swamped with pager interference, but it actually is a great band. Inversion allows your signal to travel long distances at times, especially on SSB. This video is about the Yaesu FT-225R…
 - Yaesu 857D
 A great radio that does all bands up to 70cm. Using all modes also you can talk on SSB on VHF and UHF. If you haven’t done SSB on 2m and 70cm, then I’d encourage you to do so. it is a lot of fun. This…
 - WizNet DMR
 The WizNet DMR app is still in beta testing, and at the time of writing this, you have to not only have a currently have a licence as an Amateur Radio Operator, but approved to be part of the beta testing group. You can do this…
 - What is an Antenna Coupler
 An antenna coupler (also called an antenna tuner or matching network) is a device used in radio systems to ensure impedance matching between a transmitter and an antenna. Most transmitters are designed for a specific impedance, commonly 50 ohms, while antennas often vary depending on frequency…
 - What does this Antenna do?
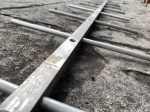 Have you ever had an antenna and forgotten what it is for? Maybe you have been given one and wasn’t told exactly what it was used for. I got given an antenna at at ham fest because it didn’t sell. Funny enough after I got it,…
 - Welle.io
 Welle.io is a DAB and DAB+ software defined radio (SDR). It runs on Windows, Linux and embedded devices like the Raspberry Pi 2 and 3. You can find the program and where to download it from their website. Using the Software With all these things, the…
 - Welcome to the siteHi there from Down Under, Melbourne Australia. Thank you for visiting my radio web site. Below is what items by category is available on this web site. Thanks again for visiting. This web site is still being built, so don’t forget to Follow us to get…
- VK3AHR Ron
 Today (20/06/25) I head Ron, VK3AHR, on the 7.100 40-meter net. I understand he ran this net for over 7 years, but hasn’t been able to for the last few weeks due to bad health. At 10am this morning he gave the group an announcement stating…
 - VARA – VARAC
 Ever heard this sound on HF / VHF / UHF? I know I have more and more recently. After a bit of research, someone told me it was VARAC. https://www.varac-hamradio.com/ As I understand it, the project started with Irad Deutsch 4Z1AC. It is free of charge…
 - Using an Android TV Box for Ham Radio
 If you want to get onto Digital Radio for less (way less) than $100, then you may be interested in this. I have Apple equipment, and therefore miss out on a lot of the testing apps that are only available on Android. There seem to be…
 - USB Device Error PL2303HXA
 I went into the device manager and found the error, my cable no longer worked. This same issue happened to a USB Card reader also.…
 - Upgrade to OpenGD77
 This page is just a help to friends I have spoke to who are interested in upgrading the Radioditty GD-77 to the OpenGD77 software. This is not my work, however I really do appreciate Roger and his team have done to put this together. I claim no responsibility if it breaks your radio, however I have not hear this happen now in some time. I am not an expert at all with OpenGD77, I have just put this together to help people who have asked me how to do it.…
 - Updating GD-77 Firmware
 Updating the firmware on the GD-77 can be daunting, as you can easily “brick” your radio. So be extremely careful. Make sure you understand why you are updating your firmware first. Since there is the option of “Bricking” your radio, and I only have the one…