Maximum Usable Frequency (MUF) is an important concept in HF radio propagation and amateur radio communications. It refers to the highest frequency that can be used for reliable communication between two locations by reflecting off the ionosphere. If a radio signal is transmitted above the MUF, it will not return to Earth and will instead pass through the ionosphere into space, making long-distance communication impossible on that frequency.
In high frequency (HF) bands between 3 MHz and 30 MHz, radio signals rely on the ionosphere to travel beyond the horizon. The ionosphere contains charged particles that can refract radio waves back toward the Earth, enabling long-distance or DX communication. Lower HF frequencies tend to bend more easily, while higher frequencies require stronger ionisation to reflect. The MUF represents the cutoff point where signals stop being reflected and begin escaping into space.
The MUF changes constantly due to several environmental factors. Solar activity, including sunspots and solar radiation, has a major influence, with higher solar activity increasing ionisation and raising the MUF. The time of day also plays a role, with daytime conditions generally producing a higher MUF due to stronger ionisation, while nighttime conditions lower the MUF as the ionosphere weakens. Additionally, the distance between stations (radio path length) affects the MUF, with longer paths often requiring higher frequencies to achieve successful propagation.
Another important concept related to MUF is the Lowest Usable Frequency (LUF). While MUF defines the upper limit, LUF defines the lowest frequency that can be used effectively without excessive signal loss or noise. The usable frequency range for communication lies between these two limits, often referred to as the optimum working frequency range. Operators typically choose a frequency slightly below the MUF for the most reliable performance.
Understanding Maximum Usable Frequency (MUF) is essential for amateur radio operators, particularly those interested in HF DXing, contesting, and propagation prediction. By knowing the current MUF, operators can select the most effective bands, such as 20 metres, 17 metres, or 15 metres, and better understand why certain bands open or close throughout the day.
In summary, MUF is the highest frequency that will be reflected by the ionosphere for a given path and time, making it a critical factor in successful long-distance HF radio communication.

How do you check MUF in real time?
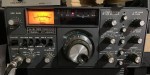
Checking the Maximum Usable Frequency (MUF) in real time is something many amateur radio operators do to decide which HF bands are open for DX communication. There are several easy ways to monitor live MUF and ionospheric conditions using online tools and software.
Online MUF Maps and Propagation Tools
One of the most popular methods is using real-time propagation websites. These display global or regional MUF based on ionospheric data (foF2 measurements).
Common tools:
- Space Weather / Propagation sites (e.g. NOAA, SpaceWeatherLive)
- VOACAP Online (predicts HF propagation paths)
- DXMaps / PSKReporter (shows real contacts happening live)
Ionosonde Data (foF2)
A more technical way to check MUF is by looking at ionosonde readings, specifically the foF2 value.
- foF2 = critical frequency of the F2 layer
- MUF is roughly calculated from this value depending on path angle
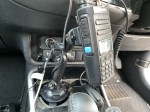
Using SDR to Observe Band Openings
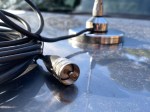
With your RTL-SDR + SDR# setup, you can actually see MUF effects:
- Tune across HF bands
- Watch the waterfall display
- Look for signals appearing/disappearing
Beacon and Reverse Beacon Networks
Another real-time method is using beacon networks:
- NCDXF/IARU beacons transmit on multiple HF bands
- Reverse Beacon Network (RBN) shows who is hearing what

Hopefully you have enjoyed reading this. If so, please like and subscribe and feel free to comment below.
Here are some other reads you might enjoy.
- HF on a Hand Held?
 Radioditty sent the new GS-10B Pro to me before it was released as they wanted you to see it first. When sending it, they never told me what to say, only to review it. So below is what I honestly experienced. This handheld radio is not only dualband UHF, VHF radio, it also receives HF,…
 - CW Skimmer
 CW Skimmer is a popular amateur radio software program used for decoding Morse code signals on the HF bands. The program is widely used by ham radio operators, DX chasers, and contest stations because it can monitor and decode many CW signals at the same time. Unlike traditional Morse code listening, CW Skimmer displays signals…
 - ADIF Master
 ADIF Master is a popular amateur radio logging software tool used for editing and managing ADIF log files. ADIF stands for Amateur Data Interchange Format, which is the worldwide standard used by ham radio operators to share QSO log information between different logging programs and online logbook services. Many amateur radio enthusiasts use ADIF Master…
 - 15 Metre band
 The 15 metre band is one of the most popular HF amateur radio bands for long-distance communication, offering an excellent balance between reliability and worldwide reach. Frequency Range The standard frequency range for the 15m band is 21.000 MHz to 21.450 MHz. Within this range, different segments are commonly used for specific modes: CW (Morse…
 - AOR AR1000XLT Fix
 The AOR AR1000XLT is a popular wideband scanner receiver that became well known among radio enthusiasts, amateur radio operators, aviation listeners, and shortwave hobbyists during the late 1980s and early 1990s. The scanner was designed to receive a massive range of radio frequencies, making it one of the most versatile handheld scanners available at the…
 - Maximum Usable Frequency (MUF) in HF Radio Propagation
 Maximum Usable Frequency (MUF) is an important concept in HF radio propagation and amateur radio communications. It refers to the highest frequency that can be used for reliable communication between two locations by reflecting off the ionosphere. If a radio signal is transmitted above the MUF, it will not return to Earth and will instead…
 - World Amateur Radio Day
 World Amateur Radio Day is celebrated every year on April 18, marking the founding of the International Amateur Radio Union (IARU) in 1925. The organisation was established in Paris when amateur radio societies from around the world joined together to represent radio operators and protect access to important radio frequencies. This date is now recognised…
 - Amateur TV
 Amateur Radio Television (ATV), often called “ham TV,” is a niche part of amateur television where licensed radio operators transmit live video and audio over radio frequencies instead of traditional broadcast networks. It is essentially an extension of amateur (ham) radio, using higher bandwidth signals to carry moving images, typically on UHF and microwave bands.…
 - Baofeng UV-5R Mini
 The Baofeng UV-5R Mini handheld radio is a popular and affordable dual-band amateur radio transceiver widely used by beginners and experienced ham radio operators. Designed as a compact version of the original UV-5R, this small and lightweight VHF/UHF walkie talkie offers solid performance for everyday communication, making it a common choice for those getting started…
 - Lightning Storm & HF Radio
 HF radio and lightning storms are closely connected because lightning creates strong radio frequency interference that affects HF radio communication (3–30 MHz). High Frequency radio is commonly used for amateur radio (ham radio), marine radio, aviation HF communication, emergency communications, and long-distance shortwave listening. HF signals travel long distances by reflecting off the ionosphere, which…
 - OpenHamClock
 OpenHamClock is an open-source amateur radio dashboard designed as a modern successor to the original HamClock used by radio amateurs worldwide. It provides a real-time visual display of essential ham radio propagation data, world clocks, DX activity, and space weather information in a single, easy-to-read interface. Built with modern web technology, OpenHamClock runs in any…