When measuring SWR, I always forget if I should lengthen or shorten the antenna. So rather than jump around the bush, I will get to the answer straight away.
The graph below will help you always remember.

- If when the frequency goes up, and the SWR goes up, as per the above green line, then you need to shorten your antenna.
- If when the frequency goes up, and the SWR goes down, as per the above brown line, then you need to lengthen your antenna.
You can reverse the above two statements also.
- If when the frequency goes down and the SWR goes down, as per the above green line, then you need to shorten your antenna.
- If when the frequency goes down, and the SWR goes up, as per hte above brown line, then you need to lengthen your antenna.
Basically, if the frequency and the SWR change in the same way, then you need to shorten it.
Hopefully that helps from now on. I know I will be looking at this myself.
Here are some other interesting reads you may enjoy!
- Basic Antenna Fundamentals
 A good friend of mine, Mike VK5ZC, put the information below together and asked me to put it on my web site. He has spent a lot of time putting it together with pictures and videos, so I encourage you to have a good read.…
 - Diamond Antenna W-8010 and expanding it to all bands
 I purchased the Diamond W series W8010 antenna and quickly put it together. The instructions were a bit hard to read as it was exceedingly small. However, I found someone who did a video on how to put it together. (this is not my video) To me,…
 - NanoVNA-H 4 Antenna Analyser
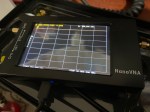 The Nano VNA-H 4 is my new toy that has just arrived after purchasing via Banggood. This Antenna Analyser is a complicated device, but doesn’t have to be, and can be a powerful tool for the Amateur Radio hobbyist. Charging the device Your NanoVNA should come with…
 - Portable HF all band Antenna and Mount
 I recently got the Radioddity M916 Heavy duty antenna magnetic mound with the Radioditty HF-008 all band portable antenna. I had always wanted to use HF more while camping or going on adventures around Australia (see our adventures page if you are interested), and now I am…
 - Fishing Line Antenna DIY
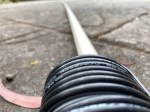
 With so many different HF antennas available, I often wondered what people in high rise buildings did. If they can not put an antenna on the roof, what options are left for them? I talk to so many people from Asian cities who would have this problem,…
 - NanoVNA H4 USB Control to PC
 If you haven’t seen my previous blog on the NanoVNA Analyser, then I suggest you look at that first before reading this blog. This one will talk about how to connect your NanoVNA to your PC via the USB cable, so I am assuming you know the…
 - Do you cut or lengthen the antenna?
 When measuring SWR, I always forget if I should lengthen or shorten the antenna. So rather than jump around the bush, I will get to the answer straight away. The graph below will help you always remember. You can reverse the above two statements also. Basically, if…
 - HF Mobile Antenna CBL-561
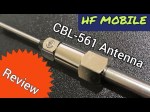 CBL-561 Review The new CBL-561 antenna is strong and light that is fit for mobile work, camping or remote radio use. I plan to use this on our next outback trip! This antenna supports a frequency range of 25-30MHz, covering both 10-meter and 11-meter bands. With a…
 - Remote testing Antennas
 I’ve always wanted to take the radio with me while on holidays and I always do. However I’ve always been limited to 2m and 70cm including local repeaters and digital work. Our family enjoy holidays all over Australia into some of the most remote places without water,…
 - Daiwa CN-460M Meter
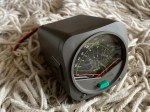 The Daiwa CN-460M is a small cross-needle meter displays both forward and reflected power for 2m and 70cm. It measures in ranges of 15/150 watts forward and 5/50 watts reflected. SO-239 jacks. It includes a mobile mounting bracket and meter illumination option if you connect the power cable. I…
 - Flowerpot Antennas
 Have you heard of a flowerpot antenna? I hadn’t until recently, and I enjoy gardening also. But this antenna has nothing to do with gardening apart from why it was named flowerpot and it will probably end up either on your roof or garden. A good friend…