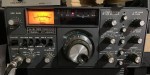
HF radio and lightning storms are closely connected because lightning creates strong radio frequency interference that affects HF radio communication (3–30 MHz). High Frequency radio is commonly used for amateur radio (ham radio), marine radio, aviation HF communication, emergency communications, and long-distance shortwave listening. HF signals travel long distances by reflecting off the ionosphere, which makes them ideal for worldwide communication without repeaters — but also makes them very sensitive to atmospheric noise.

During a lightning storm, each lightning strike produces a powerful burst of electromagnetic interference (EMI) across a wide range of frequencies. This is known as atmospheric radio noise or QRN (natural static noise). On an HF receiver, lightning interference sounds like loud static crashes, popping, and crackling across the band. The noise can raise the HF noise floor significantly, making weak signals difficult or impossible to copy.
Lightning interference does not need to be local to affect your station. Distant thunderstorms hundreds or even thousands of kilometres away can generate broadband RF noise that travels via ground wave and skywave propagation. Because HF signals reflect off the ionosphere, lightning noise can also propagate long distances. This is why operators often experience heavy static on the 40 metre band or 20 metre band even when the weather is clear overhead.
HF radio is more affected by lightning than VHF or UHF radio because lower frequencies are more susceptible to atmospheric static. Storm activity in tropical regions, including northern Australia during the wet season, can noticeably increase static levels across the HF bands in southern states such as Victoria.
Using HF radio during a thunderstorm can also pose a safety risk. Lightning strikes can induce high voltage into antenna systems, travel down coaxial feedlines, damage transceivers, destroy power supplies, and in severe cases cause fire. Even a nearby lightning strike can create a voltage surge through electromagnetic induction.
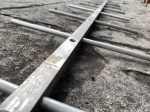
To protect HF radio equipment from lightning damage, operators commonly install lightning arrestors, use proper station grounding systems, fit surge protection devices, and disconnect antenna feedlines during storms. Many amateur radio operators physically unplug their coax cable when thunderstorms approach as an added precaution.
Lightning detection systems and weather monitoring networks also use radio frequency monitoring to track storm activity. The radio noise generated by lightning can be detected over long distances, making RF monitoring an effective method for identifying thunderstorm activity.
If you enjoyed this read, there’s more below:
- Baofeng UV-5R Mini
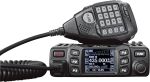
 The Baofeng UV-5R Mini handheld radio is a popular and affordable dual-band amateur radio transceiver widely used by beginners and experienced ham radio operators. Designed as a compact version of the original UV-5R, this…
 - Lightning Storm & HF Radio
 HF radio and lightning storms are closely connected because lightning creates strong radio frequency interference that affects HF radio communication (3–30 MHz). High Frequency radio is commonly used for amateur radio (ham radio), marine…
 - OpenHamClock
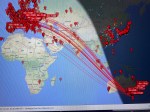
 OpenHamClock is an open-source amateur radio dashboard designed as a modern successor to the original HamClock used by radio amateurs worldwide. It provides a real-time visual display of essential ham radio propagation data, world…
 - Radtel P8 PoC radio
 The Radtel P8 PoC radio is a Push-to-Talk over Cellular (PoC) device that looks like a traditional walkie-talkie but communicates using 4G/LTE mobile networks instead of UHF/VHF radio frequencies. This means its effective range…
 - What is an Antenna Coupler
 An antenna coupler (also called an antenna tuner or matching network) is a device used in radio systems to ensure impedance matching between a transmitter and an antenna. Most transmitters are designed for a…
 - Antennas
 Amateur radio operators use many different antenna types, each designed for specific bands, space limits, and operating goals. Here’s a clear overview of the most common ones and why hams choose them. Wire Antennas…
 - Dipole Antenna for Portable Use – Make your own!
 A dipole antenna is a basic radio antenna made of two conductive elements fed at the center. It is typically a half-wavelength long and is widely used as a reference antenna in antenna theory…
 - Interference
 Interference in Amateur Radio refers to unwanted signals that disrupt radio communication. This interference can reduce signal clarity, make contacts difficult, or completely block communication between amateur radio operators. Radio Frequency Interference (RFI) is…
 - 6m and TV Channel 0
 Prior to 1989, it was illegal to operate between 50 MHz and 52 MHz in Australia. It was a real pain as that was where all the action was when the band opened up.…