
Why does a radio need a cup holder? I agree it’s a bit odd. But this isn’t a product that involves a cup. Rather it uses a cup holder.
Almost every car now has a cup holder, but they are all different sizes and locations in the car. Some are large for bottles, others are small for a small coffee. Some are in the door, others are in the centre console of the car, while others are half under the dashboard. Unless it is the same model car, they all seem to be a bit different.

One thing I’ve noticed is a cup holder is never the same size as a hand held radio. What are they thinking! As a radio operator you would think they would build cars to house our radios! Seriously though, cars hardly have any space for much extra.
My current car has almost no space to mount a radio at all. I have a radio that has all the controls on the microphone because of this. I also have a hand held radio that sits on the center console between the two front seats. But this is far from ideal as if I have to brake suddenly, the radio goes flying. Not ideal!
I saw this cup holder radio bracket that is adjustable and fits into a cup holder. It is very adjustable and fits sturdily into a cup or bottle holder.
At the top of the swivel, you can attach a fixture to attach any hand held radio via its belt clip or attach a small remote head radio via its bracket.
Once it is all secured, it works well. Now I have a hand held radio in my car, that doesn’t move around the car. It’s legal and sturdy plus I can see the screen when driving.
The other advantage of this device, apart from how easy it is to install and how versatile it is, was how easy it is to remove. So if I’m in the car for the day, or a year, I can take it out when I am done and return the car the way I found it.
Installing
Here are some quick steps how to install this device.
- After unpacking the box, get the RH1 cup holder.
- Attach the Angle-Adjusted Connector to the top.
- Attach the Handheld radio holder to the Angle Adjustment Connector. Alternatively, you can attach your radio attachment plate to the Angle Adjustment Connector if using a remote head radio or light weight radio.
- Place the RH1 in your cup holder and twist so it expands to a firm fit in the car.
- Adjust all the available angles from the bottom up to your desired location, then tighten each angle once set. Make sure it does not obstruct you driving the car or your view.
- Attach your radio
- Start using your radio!
Yes it is that easy! See the video as I do it.
Purchasing Tips
If you go via this link, you will get a discount:
https://radioddity.refr.cc/bensangster then search for your product you want.
https://www.radioddity.com/products/radioddity-rh1-cup-holder-radio-mount
Other reads
- Zastone D9000 Number Lock
 I purchased this radio from a friend, and it worked well. He hadn’t really used it, so I did a factory reset. This was a bit of a mistake, as it did a few things like turning everything…
 - Yaesu FT-620
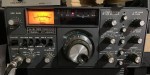
 The Yaesu FT-620 (and its updated version, the FT-620B) is a vintage amateur radio transceiver designed specifically for the 6-meter band (50–54 MHz). Produced in the 1970s, it offers support for AM, CW, and SSB (USB/LSB) modes, making it a versatile rig for its time,…
 - Yaesu FT-225R
 The 2m band has always been an interesting one for me. It used to be swamped with pager interference, but it actually is a great band. Inversion allows your signal to travel long distances at times, especially on…
 - Yaesu 857D
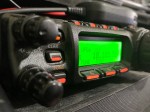 A great radio that does all bands up to 70cm. Using all modes also you can talk on SSB on VHF and UHF. If you haven’t done SSB on 2m and 70cm, then I’d encourage you to do…
 - WizNet DMR
 The WizNet DMR app is still in beta testing, and at the time of writing this, you have to not only have a currently have a licence as an Amateur Radio Operator, but approved to be part of…
 - What is an Antenna Coupler
 An antenna coupler (also called an antenna tuner or matching network) is a device used in radio systems to ensure impedance matching between a transmitter and an antenna. Most transmitters are designed for a specific impedance, commonly 50…
 - What does this Antenna do?
 Have you ever had an antenna and forgotten what it is for? Maybe you have been given one and wasn’t told exactly what it was used for. I got given an antenna at at ham fest because it…
 - Welle.io
 Welle.io is a DAB and DAB+ software defined radio (SDR). It runs on Windows, Linux and embedded devices like the Raspberry Pi 2 and 3. You can find the program and where to download it from their website.…
 - Welcome to the siteHi there from Down Under, Melbourne Australia. Thank you for visiting my radio web site. Below is what items by category is available on this web site. Thanks again for visiting. This web site is still being built,…
- VK3AHR Ron
 Today (20/06/25) I head Ron, VK3AHR, on the 7.100 40-meter net. I understand he ran this net for over 7 years, but hasn’t been able to for the last few weeks due to bad health. At 10am this…
 - VARA – VARAC
 Ever heard this sound on HF / VHF / UHF? I know I have more and more recently. After a bit of research, someone told me it was VARAC. https://www.varac-hamradio.com/ As I understand it, the project started with…
 - Using an Android TV Box for Ham Radio
 If you want to get onto Digital Radio for less (way less) than $100, then you may be interested in this. I have Apple equipment, and therefore miss out on a lot of the testing apps that are…
 - USB Device Error PL2303HXA
 I went into the device manager and found the error, my cable no longer worked. This same issue happened to a USB Card reader also.…
 - Upgrade to OpenGD77
 This page is just a help to friends I have spoke to who are interested in upgrading the Radioditty GD-77 to the OpenGD77 software. This is not my work, however I really do appreciate Roger and his team have done to put this together. I claim no responsibility if it breaks your radio, however I have not hear this happen now in some time. I am not an expert at all with OpenGD77, I have just put this together to help people who have asked me how to do it.…
 - Updating GD-77 Firmware
 Updating the firmware on the GD-77 can be daunting, as you can easily “brick” your radio. So be extremely careful. Make sure you understand why you are updating your firmware first. Since there is the option of “Bricking”…
 - Treehouse
 An unusual name, but a catchy name no less, just like Peanut that was written by the same person, David PA7LIM. If you like Peanut, then you will like this project also. This project, like Peanut, includes some amazing coding and thinking.…
 - The Radio Box
 How do you stop a hand held radio from falling and being damaged? Do you sometimes put the radio down on a bench or desk between overs or while you are waiting for someone to call you? Some…
 - The History Of YaesuAs licensed Amateur Radio operators, we have all heard about Yaesu. We have all seen a Yaesu radio and most of us have used and even own one. I’ve had and have several Yaesu radios. From extremely old…


