
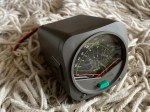
The Nano VNA-H 4 is my new toy that has just arrived after purchasing via Banggood. This Antenna Analyser is a complicated device, but doesn’t have to be, and can be a powerful tool for the Amateur Radio hobbyist.

Charging the device
Your NanoVNA should come with a USB cord. To charge it, simply plug one end into the NanoVNA box and the other end into a USB charger. A blue light should come on near the charging port.
Analysing an Antenna
The main thing we mostly want it to do is to analyse our antennas. So, let’s start off by looking at how we do that.
To analysing an antenna, we need to understand what the three SMA connectors are. There are three of them.
If you look at the bottom of each connector, you can see they are all different.
- Open – this one is open and is like an open hole. I remember this one with the route hole which looks like an O for Open.
- Short – this one has a short stick sticking out and a shiny surface around it. The shiny service reminds me of short. As in S for shiny and S for short.
- Load – this one is usually grey where the others are golden. It has a stick like the short one, but has plastic around it. It should measure as a 50 ohm load.

On your NanoVNA device, there are two SMA connectors. One that says CH0 and one that says CH1. For this experiment, we will only use CH0. The three connectors can be fitted as needed onto the CH0 SMA connection. Make sure you only put it on finger tight so you can get it off.
Turn on the NanoVNA device by sliding the switch away from the SMA connectors.
The display will look very confusing showing you heaps of information. So to simply the display, touch the screen up the top right corner and a menu will appear. If you don’t have a stylis, then you can use the blunt end of a pencil, or on the wrist band holder that comes with the device, is what looks like a guitar pluck, you can use that.
Press DISPLAY, then TRACE, and now you will see TRACE 0, TRACE 1, TRACE 2, TRACE 3 with colours on them. These colours reflect the colours of the graph currently on display. We currently have all four on, so lets turn most of them off. Press TRACE 1 twice to turn that off. If you press it to many times, it will turn on again, so press it again to turn it off. Do the same with TRACE 2 and Trace 3 so there is only TRACE 0 with one yellow line on. Now the display should look a lot more simple.
Now press the BACK menu option to return to the first menu. You can click anywhere else on the screen away from the menu to remove the menu.
Calibrate the NanoVNA
The first thing we must do is calibrate the NanoVNA. We need to calibrate the device to make sure it is right. If we are analysing between a set of frequencies, it will do one hundred calculations between them when analysing your antenna, so we need to calibrate it first between the set frequencies.
Setting up the frequency range
We first need to set up the frequency range we want to calibrate our antenna on.
Select the STIMULUS menu item. If you cannot see it, then press BACK first. Once in the STIMULUS menu, you will see START and STOP at the top of the menu. Select START and put in the start frequency via the numbers, then press either G = gigahertz, M = megahertz, k = kilohertz. The screen down the bottom left should now say START and the frequency you just entered.
Now press on the upper right of the screen and press STOP and enter the upper frequency. You should now see the frequency range you just set down the bottom of the screen.
Now we can calibrate between these frequencies.
Click up the top right to display the menu. You will not see Calibrate on the displayed menu, so press the BACK option. Now you see CAL which is calibrate.
Press CAL, then RESET to clear the device. Then press CALIBRATE to go into the calibrate menu which is listed in the order in which you want to calibrate in.
Attach the open connector (as shown above) and attach it to CH0 (hand tight only). Then press OPEN. It will only take a second and once done, OPEN will go black, and SHORT will go blue.
Now put the Short SMA connector on, then press SHORT.
Now put the Load SMA connector on, then press LOAD.
As we are doing a SWR test only, just click ISOLN then THRU and DONE while the load SMA connector is on.
You can now press SAVE 0 so next time you turn on your device, it will load this settings as you saved it in SAVE 0.
Up the top left of the screen will probably now say CH0 LOGMAG. This is not what we want to test.
Press the screen up the top right to display the menu, press DISPLAY then FORMAT, and then we get a few choices on what we want to display. For this example, we want to display SWR so press that. It should now say SWR at the top left of the screen. If we still have our load SMA connector on, you will see the yellow line is 1 right across the graph.
Take the load SMA connector off and plug in your antenna. You may need a SMA connector converter.
Looking at your screen now, the top left in yellow will tell you how many each vertical line is. For example if it says SWR 10 in yellow then each line is 10. So we need to change the scale. Press the top right of the screen to get the menu, press BACK several times until you see DISPLAY, then press it, then SCALE. In there is SCALE/DIV which is scale per division line. By pressing that we can change the value which in turn will update the graph.
If you change the SALE/DIV to .25 then press x1, it will mean each horizontal line is a quarter of a SWA. The bottom line will be 1, the next line will be 1.25, the next will be 1.5, then 1.75 and the middle line will be 2. So anything above the centre line is bad, but above it is good.
The graph will clearly show you the frequencies that the antenna is tuned for. You should now change the frequency range to these areas to get a better reading for that area and see if you can improve it further.
You can do this by bring up the menu again, pressing BACK until you see STIMULUS, press it, then change the START and the STOP to the new range you want. We do not need to calibrate again as this new frequency range is within the original calibration.
Using the Marking
There is a little marker on the graph. If you move the marker across the screen by either clicking it and dragging it or using the paddle near the on/off switch, you can move the marker across your graph. As you move the marker, the actual SWA will update up the top of the screen.
Just remember the above is the simplest option to use the NanoVNA, there are lots more you can do with it and if you subscribe to my page, you will get them as I learn them also.
Below are some related articles
- What is an Antenna Coupler
 An antenna coupler (also called an antenna tuner or matching network) is a device used in radio systems to ensure impedance matching between a transmitter and an antenna. Most transmitters are designed for a specific impedance, commonly…
 - Antennas
 Amateur radio operators use many different antenna types, each designed for specific bands, space limits, and operating goals. Here’s a clear overview of the most common ones and why hams choose them. Wire Antennas These are some…
 - What does this Antenna do?
 Have you ever had an antenna and forgotten what it is for? Maybe you have been given one and wasn’t told exactly what it was used for. I got given an antenna at at ham fest because…
 - Daiwa CN-460M Meter
 The Daiwa CN-460M is a small cross-needle meter displays both forward and reflected power for 2m and 70cm. It measures in ranges of 15/150 watts forward and 5/50 watts reflected. SO-239 jacks. It includes a mobile mounting bracket and…
 - Do you cut or lengthen the antenna?
 When measuring SWR, I always forget if I should lengthen or shorten the antenna. So rather than jump around the bush, I will get to the answer straight away. The graph below will help you always remember.…
- My Radio Diddity GD-77
 Starting in digital can be a little overwhelming to start with, no matter how many years you have had your licence.…
 - Updating GD-77 Firmware
 Updating the firmware on the GD-77 can be daunting, as you can easily “brick” your radio. So be extremely careful. Make sure you understand why you are updating your firmware first. Since there is the option of…
 - ChirpCHIRP is a free, open-source tool for programming your amateur radio. It supports a large number of manufacturers and models, as well as provides a way to interface with multiple data sources and formats. Supported Radios Supported…
- Power without Power
 In 2019 my family and I went on a five week trip through outback Australia to some of the remotest parts. We had no access to power, reception, food or water for days. We took what we…
 - Welcome to the siteHi there from Down Under, Melbourne Australia. Thank you for visiting my radio web site. Below is what items by category is available on this web site. Thanks again for visiting. This web site is still being…
- Using an Android TV Box for Ham Radio
 If you want to get onto Digital Radio for less (way less) than $100, then you may be interested in this. I have Apple equipment, and therefore miss out on a lot of the testing apps that…
 - Orion Push to Talk
 Orion is an app that isn’t really known in my world, perhaps because it isn’t available on all platforms, or because it does transmit your exact location to everyone on the channel. However there are some benefits…
 - Mini Keyboard Options
 I bought this wireless keyboard/mouse which was very cheap. It does not come with batteries, but come with a USB dongle. It has a fantastic range since it is 2.4GHz RF. The back also has good grip which apparently isn’t common on all models. You can select what colour you want the plastic to be also.…
