An antenna coupler (also called an antenna tuner or matching network) is a device used in radio systems to ensure impedance matching between a transmitter and an antenna. Most transmitters are designed for a specific impedance, commonly 50 ohms, while antennas often vary depending on frequency and design.
When the impedance is not matched, reflected power occurs, creating a high Standing Wave Ratio (SWR). This means part of the transmitted signal travels back toward the transmitter instead of being radiated. High SWR can reduce performance and potentially damage the transmitter.
The antenna coupler solves this problem by using capacitors and inductors to adjust the electrical characteristics of the antenna system. These components transform the antenna’s impedance so it appears correct to the transmitter, which reduces SWR and allows power to flow efficiently.
While an antenna coupler improves power transfer efficiency and protects equipment, it does not improve the physical performance of the antenna itself. A poorly designed antenna will still radiate poorly, even if it is properly matched.
An Manual Antenna Coupler
A manual antenna coupler requires the user to adjust controls by hand to achieve proper impedance matching. The operator typically turns knobs that vary capacitors and inductors while watching an SWR meter or power meter. Manual couplers are simple, reliable, and often less expensive, but they require time and operator skill, especially when changing frequencies.
An Automatic Antenna Coupler
An automatic antenna coupler performs the matching process by itself. It uses electronic switching and a microcontroller to quickly select the correct combination of components when the frequency changes. Automatic couplers are fast and convenient, making them ideal for systems that change frequency often or need remote operation.
In summary, manual couplers offer control and simplicity, while automatic couplers provide speed and convenience. The best choice depends on whether the operator values hands-on adjustment or automatic tuning.

A Properly Tuned Antenna
Yes—it is generally best to have an antenna that is already tuned so you don’t need an antenna coupler.
A properly tuned antenna is designed to have the correct impedance and resonance at the operating frequency. This means low SWR, efficient power radiation, and minimal reflected power. When the antenna is tuned, the transmitter can deliver power directly to it without extra matching equipment.
An antenna coupler becomes useful when the antenna cannot be perfectly tuned, such as when one antenna is used over multiple frequencies, when space limits antenna length, or when operating on wide-band systems. In these cases, the coupler helps protect the transmitter and improve power transfer, but it does not make the antenna itself more efficient.
In summary, a tuned antenna is the best solution for performance and efficiency. A coupler is a practical workaround, not a replacement for a well-designed antenna.
Making your own Coupler
You can make your own antenna coupler, and many people do—especially for learning and basic radio use.
A homemade antenna coupler is usually built as a passive matching network using inductors (coils) and capacitors. These parts are arranged in common configurations such as L-networks, T-networks, or π-networks, which allow the antenna’s impedance to be transformed to match the transmitter.
Building your own coupler has several advantages. It helps you understand impedance matching, SWR, and how RF circuits work. Homemade couplers can also be inexpensive and customized for a specific frequency range or antenna.
However, there are also limitations. A DIY coupler usually requires manual adjustment, careful construction, and testing with an SWR meter. Poor layout or low-quality components can cause losses or limit the power it can safely handle.
Making your own antenna coupler is possible and educational, especially for simple or low-power systems. For convenience, wide-frequency coverage, or higher power, commercial automatic couplers are often the better choice.
What about you?
Have you got one? What bands do you use it for and why? Have you built your own or bought one? Do you prefer a manual over an automatic coupler?
I hope you enjoy this read. Below are some suggestions you also might enjoy.
- Zastone D9000 Number Lock
 I purchased this radio from a friend, and it worked well. He hadn’t really used it, so I did a factory reset. This was a bit of a mistake, as it did a few things like…
 - Yaesu FT-620
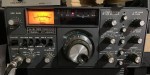
 The Yaesu FT-620 (and its updated version, the FT-620B) is a vintage amateur radio transceiver designed specifically for the 6-meter band (50–54 MHz). Produced in the 1970s, it offers support for AM, CW, and SSB (USB/LSB) modes, making it a versatile rig for…
 - Yaesu FT-225R
 The 2m band has always been an interesting one for me. It used to be swamped with pager interference, but it actually is a great band. Inversion allows your signal to travel long distances at times,…
 - Yaesu 857D
 A great radio that does all bands up to 70cm. Using all modes also you can talk on SSB on VHF and UHF. If you haven’t done SSB on 2m and 70cm, then I’d encourage you…
 - WizNet DMR
 The WizNet DMR app is still in beta testing, and at the time of writing this, you have to not only have a currently have a licence as an Amateur Radio Operator, but approved to be…
 - What is an Antenna Coupler
 An antenna coupler (also called an antenna tuner or matching network) is a device used in radio systems to ensure impedance matching between a transmitter and an antenna. Most transmitters are designed for a specific impedance,…
 - What does this Antenna do?
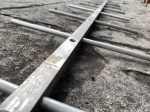 Have you ever had an antenna and forgotten what it is for? Maybe you have been given one and wasn’t told exactly what it was used for. I got given an antenna at at ham fest…
 - Welle.io
 Welle.io is a DAB and DAB+ software defined radio (SDR). It runs on Windows, Linux and embedded devices like the Raspberry Pi 2 and 3. You can find the program and where to download it from…
 - Welcome to the siteHi there from Down Under, Melbourne Australia. Thank you for visiting my radio web site. Below is what items by category is available on this web site. Thanks again for visiting. This web site is still…
- VK3AHR Ron
 Today (20/06/25) I head Ron, VK3AHR, on the 7.100 40-meter net. I understand he ran this net for over 7 years, but hasn’t been able to for the last few weeks due to bad health. At…
 - VARA – VARAC
 Ever heard this sound on HF / VHF / UHF? I know I have more and more recently. After a bit of research, someone told me it was VARAC. https://www.varac-hamradio.com/ As I understand it, the project…
 - Using an Android TV Box for Ham Radio
 If you want to get onto Digital Radio for less (way less) than $100, then you may be interested in this. I have Apple equipment, and therefore miss out on a lot of the testing apps…
 - USB Device Error PL2303HXA
 I went into the device manager and found the error, my cable no longer worked. This same issue happened to a USB Card reader also.…